
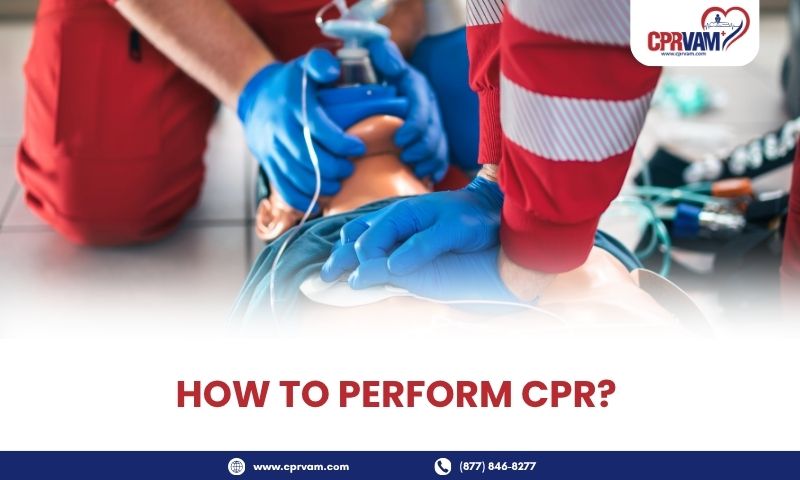
Emergency Warning: When someone is unresponsive and not breathing normally or is only gasping, every second counts. Call your local emergency number immediately and start CPR. Knowing how to perform CPR can help you take lifesaving action by checking responsiveness, recognizing cardiac arrest, giving chest compressions and rescue breaths when appropriate, and using an automated external defibrillator (AED) as soon as one is available. Follow the emergency dispatcher’s instructions.
Cardiopulmonary resuscitation (CPR) is a lifesaving emergency procedure that helps maintain blood flow to the brain and other vital organs during cardiac arrest. Acting quickly and performing CPR correctly can improve a person’s chances of survival until professional medical help arrives. This guide follows established resuscitation guidance from recognized organizations, including the American Heart Association (AHA) and the International Liaison Committee on Resuscitation (ILCOR).
This blog explains how to perform CPR on adults, children, and infants, use an AED, and respond to cardiac arrest during pregnancy with clear, step-by-step instructions.
What Is CPR?
Cardiopulmonary resuscitation (CPR) is an emergency first-aid procedure used when someone is unresponsive and not breathing normally. It combines chest compressions and, when appropriate, rescue breaths to help maintain blood flow and deliver oxygen to vital organs until emergency medical help arrives.
Chest compressions help circulate blood to the brain and other vital organs, while rescue breaths provide oxygen. An automated external defibrillator (AED) can analyze the heart’s rhythm and deliver an electrical shock when needed.
CPR does not guarantee survival, but starting it promptly during suspected cardiac arrest can improve the chances of survival. Recognizing the warning signs and knowing when and how to perform CPR can help you respond quickly in an emergency.
Key CPR Facts:
CPR Element | What You Need to Know |
Purpose | Helps maintain blood circulation during cardiac arrest. |
Chest Compressions | Help move blood to the brain and other vital organs. |
Rescue Breaths | Provide oxygen when included in CPR. |
Automated External Defibrillator (AED) | Analyzes the heart’s rhythm and delivers a shock when indicated. |
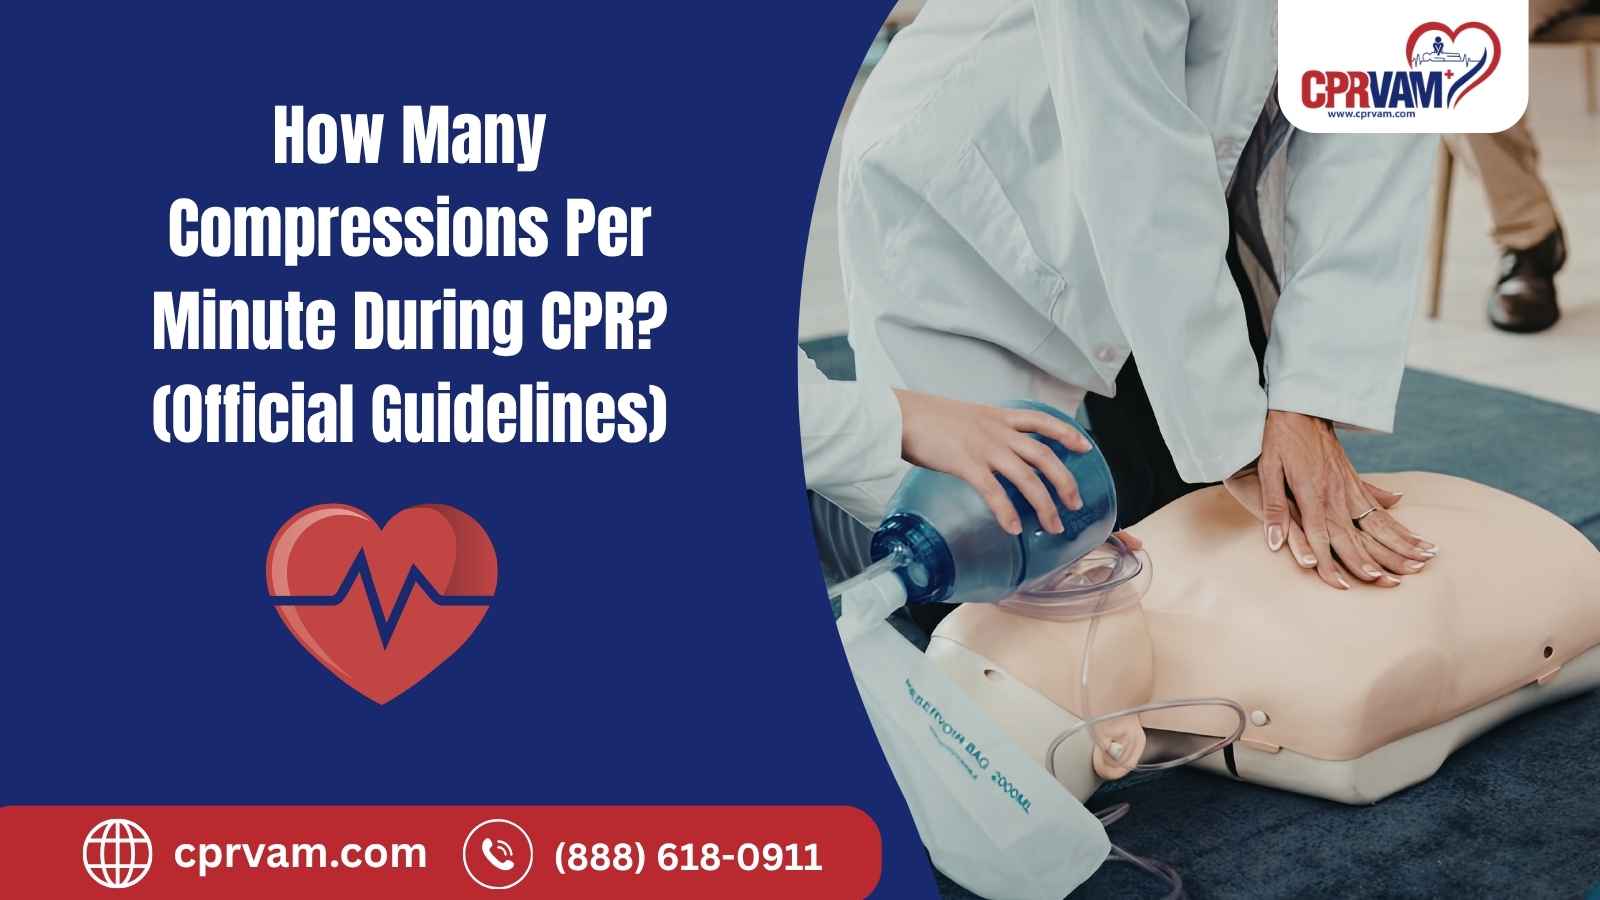
Compression Rate | Generally 100-120 compressions per minute for adults, children, and infants. |
When to Start CPR | When someone is unresponsive and not breathing normally or is only gasping. |
These key facts reflect general CPR principles. Compression depth, technique, and rescue-breathing recommendations vary by age and situation. Follow current guidance from recognized resuscitation organizations, including the AHA and ILCOR, and follow the emergency dispatcher’s instructions.
When Should You Perform CPR?
Start CPR when a person is unresponsive and not breathing normally or is only gasping. These signs may indicate cardiac arrest, which requires immediate action.
Common warning signs include:
Unresponsiveness: The person does not respond when you speak loudly or gently tap their shoulders.
Absent or Abnormal Breathing: The person is not breathing normally or is only gasping.
Sudden Collapse: The person suddenly collapses and becomes unresponsive.
Ineffective Breathing: The person’s breathing is irregular or consists of occasional gasps rather than normal, regular breaths.
Gasping is not normal breathing and should not delay CPR when cardiac arrest is suspected. If the person is unresponsive and not breathing normally, call your local emergency number and begin CPR. If you are not trained to check a pulse, do not waste time trying to find one. Follow the emergency dispatcher’s instructions.
If the person is unresponsive but breathing normally, call emergency services, monitor their breathing, and place them in the recovery position when appropriate. If their breathing becomes abnormal or stops, begin CPR immediately.
How to Perform CPR on an Adult
Knowing how to perform CPR on an adult can help you respond quickly during a cardiac emergency. If someone is unresponsive and not breathing normally or is only gasping, call your local emergency number and begin CPR immediately. Ask someone to bring an automated external defibrillator (AED), if one is available.
Follow these six steps while waiting for emergency medical help:
Step 1: Check the Scene and Responsiveness
Before approaching the person, make sure the area is safe. Look for hazards such as moving traffic, fire, or exposed electrical equipment.
Once the area is safe:
- Gently tap the person’s shoulders.
- Speak loudly and ask, “Are you okay?”
- Check for a response, movement, or signs of awareness.
- If the person does not respond, call your local emergency number or ask someone nearby to call.
- Ask someone to get an AED, if available.
If you have a mobile phone, use speaker mode so you can follow the emergency dispatcher’s instructions while helping the person. If someone else is present, ask them to call for help and retrieve the AED while you stay with the person.
Step 2: Check for Normal Breathing
Observe the person’s chest to determine whether it rises and falls normally. Check their breathing for no more than 10 seconds, watching for regular, effective breaths. Do not delay the assessment, as prompt recognition of abnormal breathing is essential during a suspected cardiac emergency.
Occasional gasps, irregular snorting sounds, or other abnormal breathing patterns are not considered normal. If the person is unresponsive and not breathing normally, begin CPR immediately. If you are not trained to check a pulse, avoid wasting valuable time attempting to locate one.
Step 3: Perform Chest Compressions
Chest compressions help keep blood flowing to the brain and other vital organs during cardiac arrest. The correct hand position, compression depth, and rate are important for effective adult CPR.
Follow these steps:
- Place the person on their back on a firm, flat surface, when feasible.
- Kneel beside their chest.
- Place the heel of one hand in the center of the chest, on the lower half of the breastbone.
- Place your other hand on top and interlock your fingers.
- Keep your arms straight and your shoulders directly above your hands.
- Press straight down approximately 5–6 cm (2–2.4 inches).
- Maintain a rate of 100–120 compressions per minute.
- Allow the chest to return fully to its normal position after each compression.
Use your upper-body weight to help compress the chest to the correct depth. Keep interruptions as short as possible.
Step 4: Give Rescue Breaths
If you are trained and able to provide rescue breaths, use a ratio of 30 chest compressions to 2 breaths.
After completing 30 compressions:
- Tilt the person’s head back and lift their chin to open the airway.
- Pinch their nose closed.
- Seal your mouth over theirs.
- Give one breath lasting about one second and watch for the chest to rise.
- Give a second breath.
- Resume chest compressions immediately.
Give only enough air to make the chest rise. Avoid forceful or excessive breaths. If the chest does not rise, reposition the airway and try again without delaying compressions unnecessarily.
If you are untrained or unable to give rescue breaths, perform hands-only CPR by delivering continuous chest compressions at a rate of 100–120 per minute. Follow the emergency dispatcher’s instructions.
Step 5: Use an Automated External Defibrillator (AED)
An automated external defibrillator (AED) checks the heart’s rhythm and determines whether an electrical shock is needed. Using an AED as soon as possible, along with CPR, can improve the person’s chances of survival.
To use an AED:
- Turn on the device and follow its voice instructions.
- Expose the person’s chest and dry it if necessary.
- Attach the electrode pads according to the diagrams on the pads.
- Make sure no one touches the person while the AED analyzes the heart’s rhythm.
- If the device advises a shock, ensure everyone is clear before delivering it.
- Resume CPR immediately when instructed by the device.
Use pediatric pads or settings for children and infants when appropriate and available. If pediatric equipment is unavailable, follow the AED manufacturer’s instructions and the emergency dispatcher’s guidance.
Step 6: Continue CPR Until Help Arrives
Continue CPR and follow the AED’s instructions until one of the following occurs:
- The person begins moving, responding, or breathing normally.
- Emergency medical personnel take over.
- You become physically unable to continue.
- A qualified responder or emergency dispatcher directs you to stop.
If another trained rescuer is available, take turns performing CPR approximately every two minutes, or sooner if needed. Switch quickly to avoid unnecessary interruptions to chest compressions.
Important: This guide provides general instructions for adult CPR. If you encounter a cardiac emergency, call your local emergency number, follow the dispatcher’s instructions, and use an AED as soon as one is available.
Adult CPR Quick Reference
Use this table as a quick reference for the key steps and techniques involved in adult CPR.
CPR Technique | Adult CPR Guidelines |
Hand Position | Place the heel of one hand in the center of the chest, on the lower half of the breastbone. Place the other hand on top. |
Compression Rate | 100-120 compressions per minute. |
Compression Depth | Approximately 5-6 cm (2-2.4 inches). |
CPR Ratio | 30 chest compressions followed by 2 rescue breaths, when providing conventional CPR. |
Rescue Breaths | Give each breath over approximately one second, watching for the chest to rise. |
Hands-Only CPR | If you are untrained or unable to give rescue breaths, provide continuous chest compressions and follow the emergency dispatcher’s instructions. |
How to Perform CPR on a Child
CPR for children older than 1 year follows the same basic principles as adult CPR, but compression depth and hand placement must be adjusted to the child’s size. Rescue breaths are especially important because cardiac arrest in children can be caused by breathing problems, including drowning.
If a child is unresponsive and not breathing normally or is only gasping, call your local emergency number and begin CPR immediately.
Child CPR Instructions:
1. Check the Child's Responsiveness
Ensure the area is safe, then gently tap the child’s shoulder and speak loudly to check for a response. If the child remains unresponsive and is not breathing normally or is only gasping, prepare to begin CPR without delay.
2. Call for Emergency Help
Ask someone nearby to contact emergency services and retrieve an automated external defibrillator (AED), if available. If you are alone, follow the emergency dispatcher’s instructions for calling for help and beginning CPR. Avoid unnecessary delays in providing assistance.
3. Position the Child
Carefully place the child on their back on a firm, flat surface to support effective chest compressions. Position yourself beside the child’s chest so you can maintain proper hand placement, compression depth, and rhythm throughout the resuscitation process.
4. Position Your Hands Correctly
Place the heel of one hand in the center of the child’s chest, on the lower half of the breastbone. Depending on the child’s size and your strength, use one or both hands to deliver effective compressions while maintaining proper positioning.
5. Perform Chest Compressions
Press down approximately one-third of the chest’s front-to-back depth, usually about 5 cm (2 inches) for a child. Maintain a rate of 100–120 compressions per minute, allow the chest to return fully after each compression, and minimize interruptions.
6. Give Rescue Breaths If Trained
Open the child’s airway using the head-tilt, chin-lift technique, then pinch the nose and seal your mouth over theirs. Give two gentle breaths, each lasting about one second, and check for visible chest rise. Avoid excessive force when delivering breaths.
7. Follow the Correct CPR Ratio
For conventional CPR, a single rescuer generally performs 30 chest compressions followed by two rescue breaths. When two trained rescuers are available, pediatric CPR generally uses 15 compressions followed by two breaths. Follow your training and applicable resuscitation guidelines.
8. Use an AED as Soon as Possible
Turn on the AED and follow its voice prompts carefully. Use pediatric pads or settings when available and appropriate for the child. If pediatric equipment is unavailable, follow the device manufacturer’s instructions and the emergency dispatcher’s guidance without delaying CPR.
Continue CPR until the child shows signs of recovery and breathes normally, emergency responders take over, you become physically unable to continue, or a qualified responder directs you to stop. Follow the emergency dispatcher’s instructions throughout the process.
How to Perform CPR on an Infant
Infant CPR requires extra care because babies have smaller, more delicate chests and airways. These instructions apply to infants younger than 1 year, excluding newborns immediately after birth, who require specialized neonatal resuscitation.
If an infant is unresponsive and not breathing normally or is only gasping, call your local emergency number and begin CPR. Rescue breaths are particularly important in infant CPR because breathing problems can contribute to cardiac arrest.
Infant CPR: Step-by-Step Guide:
1. Assess the Infant's Responsiveness
Ensure the scene is safe, then gently tap the infant’s foot and look for signs of a response. Never shake an infant. If the infant is unresponsive and is not breathing normally or is only gasping, prepare to begin CPR promptly.
2. Contact Emergency Services
If someone is nearby, ask them to call emergency services and retrieve an automated external defibrillator (AED), if available. If you are alone, use your phone to contact emergency services on speaker mode and follow the dispatcher’s instructions while beginning CPR.
3. Position the Infant Correctly
Carefully place the infant on their back on a firm, flat surface to support effective chest compressions. Keep the head in a neutral position to help maintain an open airway, avoiding excessive backward tilting that could interfere with breathing.
4. Ensure Proper Hand Placement
Use the infant chest-compression technique taught in your current CPR training. The 2025 American Heart Association (AHA) pediatric CPR guidelines recommend either the heel of one hand or the two-thumb encircling-hands technique. Follow your training to maintain proper placement and effective compressions.
5. Deliver Effective Chest Compressions
Compress the infant’s chest approximately one-third of its front-to-back depth, or about 4 cm (1.5 inches). Maintain a rate of 100–120 compressions per minute, allow the chest to return fully after each compression, and minimize interruptions to support effective CPR.
6. Open the Airway
Gently position the infant’s head in a neutral or slightly extended position to help open the airway. Avoid tilting the head too far backward, as this may obstruct breathing. Maintain the correct head position when preparing to give rescue breaths.
7. Give Gentle Rescue Breaths If Trained
Cover the infant’s mouth and nose with your mouth, then give a gentle breath lasting about one second while watching for the chest to rise. For conventional CPR as a single rescuer, give 30 chest compressions followed by two rescue breaths.
8. Continue CPR and Use an AED
Immediately resume chest compressions after giving rescue breaths and continue CPR with minimal interruptions. Use an automated external defibrillator (AED) as soon as possible, following its voice prompts. Use pediatric pads or settings when available and follow the device instructions and emergency dispatcher’s guidance.
Continue CPR until the infant begins responding and breathing normally, emergency responders take over, or you are physically unable to continue. Follow the emergency dispatcher’s instructions throughout the process.
How to Perform CPR on a Pregnant Woman
Performing cardiopulmonary resuscitation (CPR) on a pregnant woman requires prompt action and special considerations. The priority is to restore circulation and support the mother’s survival while allowing medical professionals to provide appropriate care for both the mother and baby.
If a pregnant woman is unresponsive and not breathing normally or is only gasping, call your local emergency number and begin CPR immediately. Do not delay chest compressions because the woman is pregnant.
Step-by-Step Guide to CPR During Pregnancy
1. Call for Emergency Help Immediately
Call emergency services and tell the dispatcher that the woman is pregnant. Ask someone nearby to retrieve an automated external defibrillator (AED), if available, while you begin CPR. Follow the dispatcher’s instructions throughout the emergency.
2. Position the Woman on a Firm, Flat Surface
Lay the pregnant woman on her back on a firm, flat surface to allow effective chest compressions. Do not delay CPR to adjust her position. Begin chest compressions immediately and follow the emergency dispatcher’s instructions.
3. Begin Chest Compressions
Place the heel of one hand in the center of the chest, on the lower half of the breastbone, and place your other hand on top. Keep your arms straight and your shoulders positioned over your hands.
Push hard and fast at a rate of 100-120 compressions per minute. Compress the adult chest approximately 5-6 cm (2-2.4 inches), avoid excessive depth, and allow the chest to return fully after each compression. Minimize interruptions.
4. Give Rescue Breaths If Trained and Able
If you are trained and able to provide rescue breaths, give 30 chest compressions followed by 2 breaths. Each breath should last about one second and produce visible chest rise.
If you are untrained or unable to give rescue breaths, perform hands-only CPR and follow the emergency dispatcher’s instructions.
5. Perform Left Uterine Displacement During CPR
During later pregnancy, the enlarged uterus can press on major blood vessels when a woman lies on her back, reducing blood flow to the heart. When the top of the uterus is at or above the belly button, a trained rescuer should gently move the uterus toward the woman’s left side while another rescuer continues chest compressions, if possible.
This technique helps relieve pressure on major blood vessels without interrupting chest compressions. If you are not trained in this technique, prioritize high-quality CPR and follow the emergency dispatcher’s instructions.
6. Use an AED as Soon as Possible
Turn on the AED and follow its voice prompts. Expose the chest, attach the electrode pads according to the diagrams, and ensure nobody touches the woman while the device analyzes her heart rhythm. Deliver a shock if advised, then resume CPR immediately as directed.
Pregnancy is not a reason to withhold an AED or defibrillation. Use the device according to its instructions and the emergency dispatcher’s guidance.
7. Continue CPR Until Emergency Help Arrives
Continue CPR until the woman begins responding and breathing normally, emergency medical personnel take over, or you are physically unable to continue. Follow the emergency dispatcher’s instructions throughout the process.
Important Considerations for Cardiac Arrest During Pregnancy
Cardiac arrest during pregnancy requires urgent advanced medical care. Healthcare professionals must provide high-quality CPR, address the cause of cardiac arrest, and manage pregnancy-related complications.
If standard resuscitation does not restore circulation, the medical team may need to consider an emergency resuscitative delivery. Under the 2025 AHA guidelines, preparation should begin as soon as cardiac arrest is recognized, to complete delivery within five minutes when indicated. This is a specialized medical intervention that must be managed by a trained healthcare team and should not delay CPR.
CPR Differences by Age: Adults, Children, and Infants
CPR techniques vary by age, particularly in chest compression depth, hand placement, and rescue breaths. Use the following table as a quick reference to understand the key differences between adult CPR, child CPR, and infant CPR.
CPR Feature | Adults | Children (Over 1 Year) | Infants (Under 1 Year) |
Compression Position | Center of the chest, on the lower half of the breastbone. | Center of the chest, on the lower half of the breastbone; use one or two hands depending on the child’s size. | Center of the chest, on the lower half of the breastbone, using an age-appropriate technique. |
Compression Depth | Approximately 5-6 cm (2-2.4 inches). | About one-third of the chest’s front-to-back depth, typically 5 cm (2 inches). | About one-third of the chest’s front-to-back depth, approximately 4 cm (1.5 inches). |
Compression Rate | 100-120 compressions per minute. | 100-120 compressions per minute. | 100-120 compressions per minute. |
Single-Rescuer CPR Ratio | 30 compressions to 2 breaths (30:2). | 30 compressions to 2 breaths (30:2). | 30 compressions to 2 breaths (30:2). |
Two-Rescuer Pediatric CPR Ratio | Follow adult CPR guidance. | 15 compressions to 2 breaths (15:2). | 15 compressions to 2 breaths (15:2). |
Rescue Breaths | Seal your mouth over the person’s mouth and give breaths that produce visible chest rise. | Seal your mouth over the child’s mouth and give gentle breaths that produce visible chest rise. | Cover the infant’s mouth and nose with your mouth and give gentle breaths that produce visible chest rise. |
AED Use | Use an AED as soon as possible and follow its prompts. | Use an AED as soon as possible, with pediatric pads or settings when available and appropriate. | Use an AED as soon as possible, with pediatric pads or settings when available and appropriate. |
Important: This table is a quick reference, not a substitute for hands-on CPR training or current resuscitation guidelines. If someone is unresponsive and not breathing normally or is only gasping, call your local emergency number, begin CPR, and use an AED as soon as possible. Follow the emergency dispatcher’s instructions.
Common CPR Mistakes to Avoid During CPR
Performing CPR correctly can help improve its effectiveness during a cardiac emergency. Understanding these common mistakes can help you respond more confidently and provide better care until emergency responders arrive.
Here are some common mistakes to avoid when performing CPR:
1. Delaying Emergency Assistance
Call emergency services as soon as possible and begin CPR when indicated. Do not wait for an unresponsive person to recover on their own.
2. Using the Wrong Compression Rate or Depth
Aim for a compression rate of 100-120 compressions per minute. Adjust the depth and technique according to the person’s age and size to provide effective chest compressions.
3. Failing to Allow Full Chest Recoil
Allow the chest to return to its normal position after each compression. Avoid leaning on the chest between compressions, as this can reduce CPR effectiveness.
4. Giving Excessive Rescue Breaths
If you are trained to give rescue breaths, deliver each breath over approximately one second, using only enough air to make the chest visibly rise. Avoid forceful or excessive breaths.
5. Interrupting Compressions for Too Long
Keep interruptions to chest compressions as short as possible. Pause only when necessary, such as to provide rescue breaths, allow an AED to analyze the heart rhythm, or transfer care to emergency responders.
6. Ignoring the AED
Use an automated external defibrillator (AED) as soon as one is available. Follow its voice and visual instructions, and use pediatric pads or settings for children and infants when available and appropriate.
7. Mistaking Gasping for Normal Breathing
Occasional gasps or irregular breathing are not considered normal breathing. If a person is unresponsive and is not breathing normally or is only gasping, call emergency services and begin CPR as directed by your training or the emergency dispatcher.
Learn How to Perform CPR and Save Lives
Knowing how to perform CPR can help you respond effectively during a cardiac emergency. Recognizing when to begin CPR, performing chest compressions correctly, and using an automated external defibrillator (AED) can improve a person’s chances of survival. Learn the appropriate CPR techniques for adults, children, and infants, and consider taking certified CPR training to build your skills and confidence. Being prepared can help you take prompt action when every second matters.
Ready to Expand Your Life-Saving Skills?
Explore CPR, BLS, ACLS, PALS, and other certification courses at CPR VAM to strengthen your clinical knowledge and prepare for real-world emergencies. Choose the certification course that aligns with your professional goals and take the next step toward improving your emergency response skills.
FAQs
1. How Long Should You Perform CPR?
You should continue CPR until the person shows signs of recovery and breathes normally, emergency medical personnel take over, or you become physically unable to continue. Follow the emergency dispatcher’s instructions throughout the process. Avoid unnecessary interruptions, as continuous chest compressions help maintain blood flow to vital organs.
2. What Should You Do Before Starting CPR?
First, make sure the area is safe, then check responsiveness by gently tapping the person’s shoulders and speaking loudly. Check whether they are breathing normally, and call emergency services or ask someone nearby to call and bring an AED if available. If the person is unresponsive and not breathing normally or is only gasping, begin CPR immediately.
3. Can CPR Cause Injuries?
Yes. Effective chest compressions during CPR can sometimes break ribs or cause other chest injuries, particularly in adults. However, these risks should not prevent you from performing CPR when cardiac arrest is suspected. Prompt CPR can improve the person’s chances of survival and is far more important than the risk of rib fractures.
4. What is Hands-Only CPR, and When is It Appropriate?
Hands-only CPR involves performing continuous chest compressions without giving rescue breaths. It is an option for bystanders assisting an adult who suddenly collapses and is suspected of having cardiac arrest. For children, infants, and drowning-related emergencies, CPR with rescue breaths is particularly important when the rescuer is trained and able to provide them.
5. What is the Difference Between CPR and an AED?
CPR uses chest compressions and, when appropriate, rescue breaths to help maintain circulation and oxygen delivery. An automated external defibrillator (AED) analyzes the heart’s rhythm and advises whether an electrical shock is needed. Using an AED promptly alongside CPR can improve the chances of survival during cardiac arrest.